
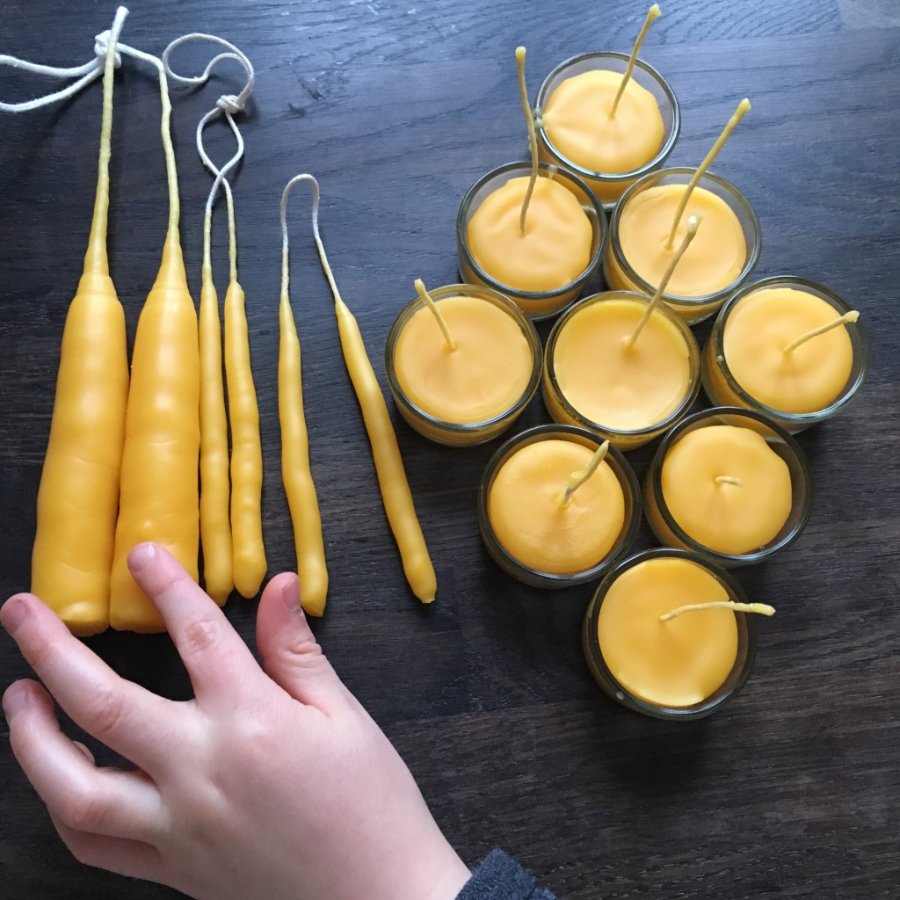
This reminds me of childhood. Something as cozy as homemade beeswax candles. Not the rolled kind – which is also quite nice, but the ones you melt and pour into molds, or dip wicks into.
The result was SO nice and it really has been a nice activity at our house.
If you want to know how we did it, there are a few DIY guides for homemade beeswax candles below.
You need:
- Beeswax – can be purchased here
- You can find walls here. 3 x 5 meters in various sizes.
- Possibly holders/stands for tealights. We have them here in glass.
Make beeswax candles yourself
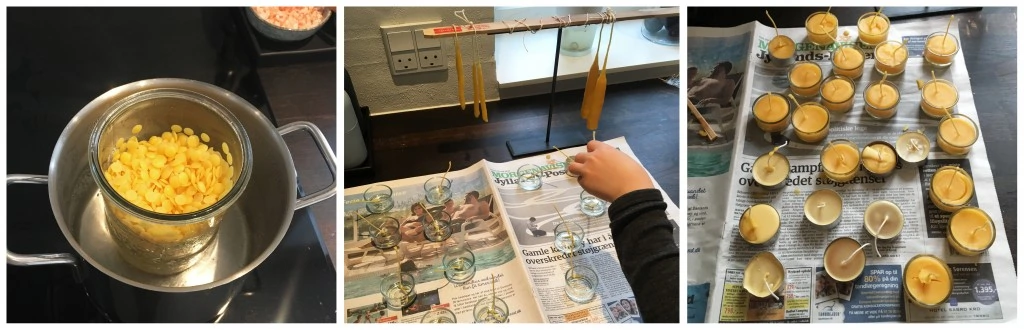
Start by melting beeswax over a water bath. So bee wax into a bowl – and then the bowl into a suitably sized pan of boiling water. Here, it is important to use a bowl that is taller than it is wide, so that it is possible to have the wick dipped a good distance into the melted beeswax – depending on how high you want them. I used a tall storage glass like this one, which worked fine for the purpose.
The beeswax melted quietly. Turn down the heat when the beeswax has melted. It should preferably not exceed 80 degrees.
When the beeswax has melted, light production can in principle start.
It is super smart to cut the wick so that you have a nice long piece. Hold the wick in the middle and dip both wick ends into the melted beeswax at the same time. This requires that you make sure to keep some distance between the wicks, possibly using a fork. That way, you can make two lights at a time – and it will be much easier to dry the candles afterwards.
When the wick has been dipped in beeswax, it must be allowed to dry up for a few seconds. Then you dip the wicks into the wax again – and you just keep doing that until the candles have a suitable thickness. At the very beginning, you can shape the wick and the candle when the beeswax has dried a little. It may be necessary if the wick twists a little.
When you're done, hang the candles to dry over a stick or something convenient. I happened to have a jewelry stand that worked just fine for the purpose – albeit with a little assistance from a wrapped mixing stick from a painting project. Alternatively, you can use two bricks and a stick to lay across. There are plenty of options.
Make tea lights yourself from beeswax
The starting point for tealights made of beeswax is the same as for tealights. That means melting beeswax granules over a water bath. If you have already made candlesticks, it makes super good sense to use the rest for tealights.
We started by putting the forms out and placed a piece of newspaper underneath. We have collected a few forms. There is a mixture of recycling (i.e. aluminum molds from tealights) and some reusable glass molds such as these
We tied a small screw to a piece of wick and dipped them in the melted beeswax. The screw allows the wick to be held in place on the bottom when the melted beeswax is poured. I would recommend using the thinnest of the three wicks for tealights. The other two thicknesses are more suitable for pendant lights.
The beeswax is carefully poured into the moulds. Here it can be good to be two. So én to pour and én to hold the wick in place.
And then there is just candlelight for the dark cozy time. Have fun:-)